Sunday, July 19, 2009

More shelving progress

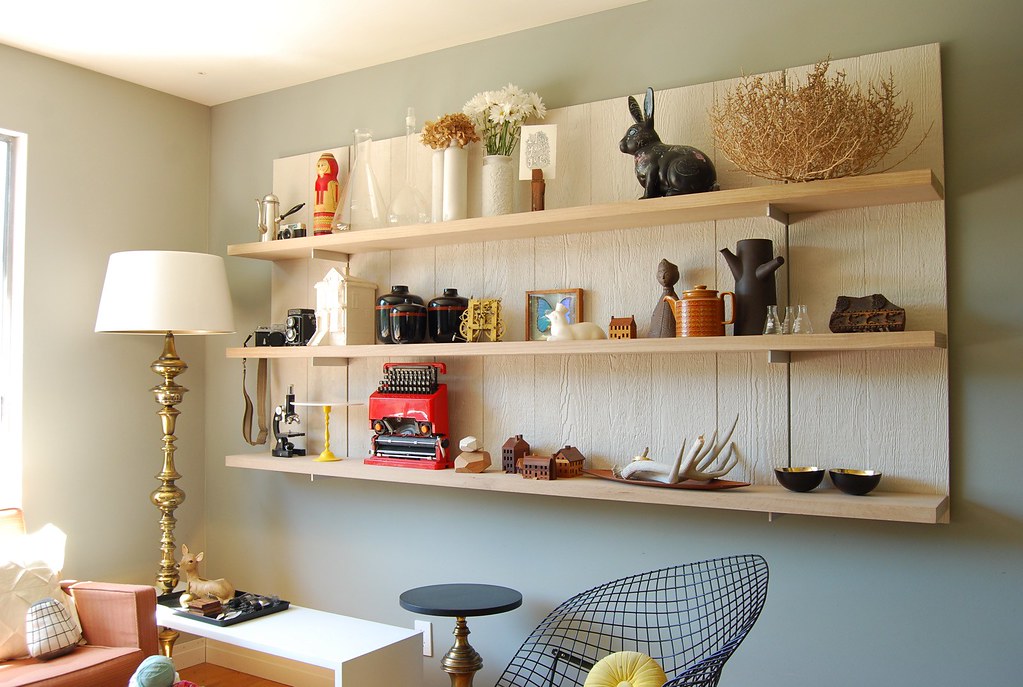
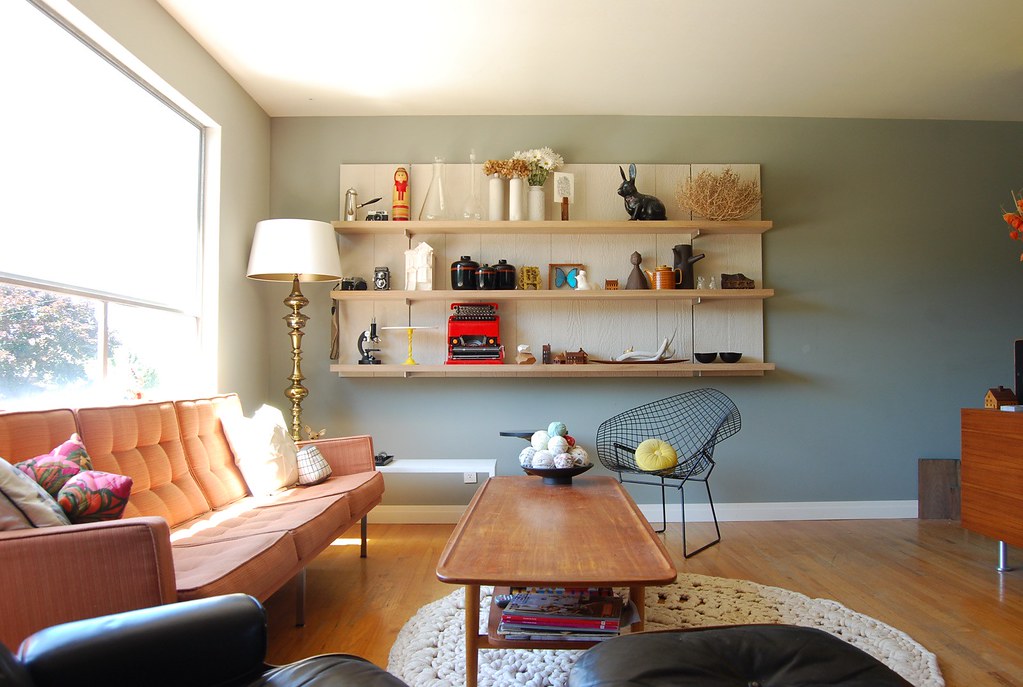
2 more shelves done and I think I might not need the 4th one. Here are some pics installed with goodies on the shelves.


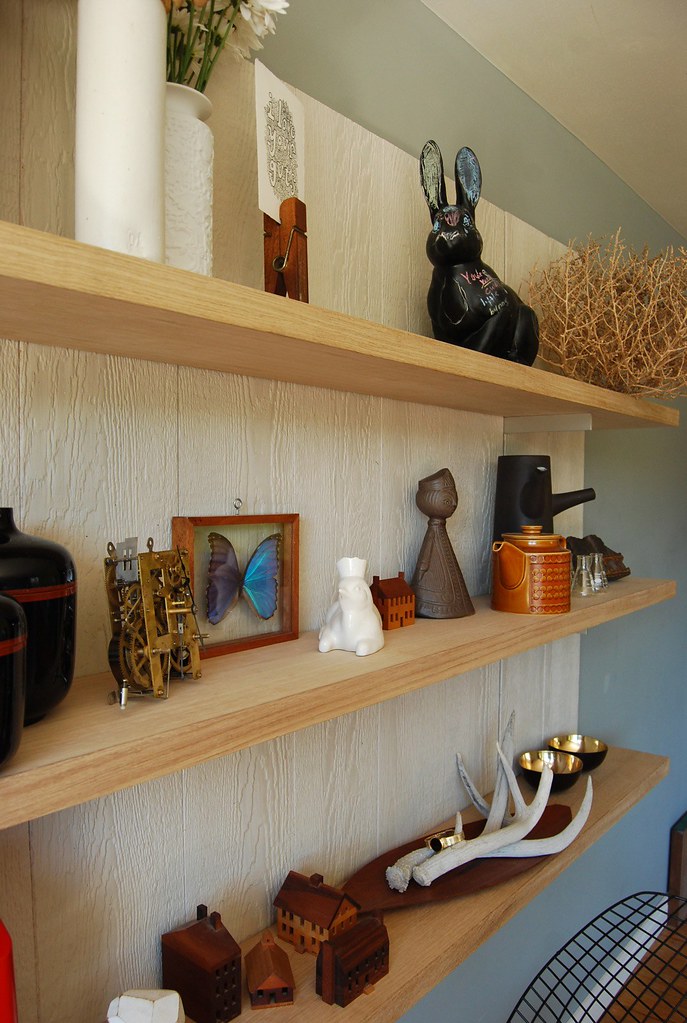
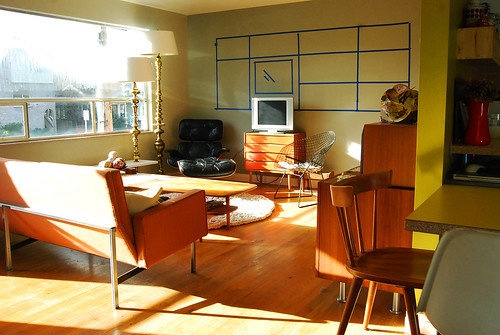
Above is a before shot with blue tape outlining the proposed shelving arrangement (the TV was originally going to go here). Months and months later the dream is nearly realized! Just have to figure out how to finish the shelves, but not change the color of the wood (I don't want it to yellow...any ideas?).

Friday, July 17, 2009

Shelving at last...almost...sort of


Anyone who has visited '30 in the past 2+ months may recall the seemingly purposeless white wood textured panels on our wall. The panels were the beginning of our built-in shelving...one of those projects that has taken way too long. We got one step closer recently. Finally have 1 shelf of 4 sort-of-kind-of ready. I'm pretending it's ready at least. 3 more to go! Plus notching for the brackets and finishing them.


I am building the shelves using this great bracket system from Rakks and using the wood-textured wall panels (actually planks of primed house siding) as wall panels that hide the the required vertical brackets in the gaps between. The shelves will be lightened white oak and will be adjustable in height using the clever camming action of the Rakks bracket.

More on the whole project when I finally get the damn thing done.

Monday, July 13, 2009

Ultimate Freedom Meal 09'


Oh! What a glory day it was to celebrate the day of freedom. The dupe (our house) celebrated honored our country with great pride by coming together to make an awesome freedom meal.....well actually, to be honest, we really just needed an excuse to convince Jesse to make his infamous burgers made with red wine reduced sauce and shallots. Ever since he first mentioned the process on how to make those burgers a year ago, we've been dreaming about it ever since. So what better time to make a burger than on July the 4th?
Chika on the other hand took charge of making some homemade french fries & curry ketchup! You'd think that making fries is easy as cutting it up and just throwing them into a giant pot of hot oil...well, not these twice-fried-perfectly-crispy-outside-with-soft-inside-fries.
Chika peeled, sliced, and soaked them in water the day before to take out some starch. This was an important step to ensure the best result for the fries.
At the dupe, we don't joke around. We don't just do the most obvious and quickest cooking technique. We like to prolong the process, add more steps, or reduce whatever liquid we can to make these seemingly simple dishes more than awesome.
The burgers and fries were beyond my expectations. Burgers were juicy and well flavored...the fries were crunchy and soft at the same time. It was just heavenly. Burgers+fries=Freedom=Food coma in heaven.......with burger angels. ooh yeah.....
For dessert, I made Chocolate croissant bread pudding. This also required an extra step of pre-toasting the croissant so it's extra crunch and buttery! This is not a dish that's highly recommended for the South Beach dieters...fyi.
I used a recipe online, but altered it a little by adding sherry to the sauce and used 97% dark chocolate. I topped it with some toasted hazelnut and homemade cinnamon whipping cream. But here's my slightly altered recipe:

Dark Chocolate Croissant Bread Pudding
  • 4 to 5 large croissants, cut into 1-inch cubes to measure 6 cups
  • 5 tablespoons softened butter, divided
  • 2 cups half and half
  • 8 ounces dark chocolate, chopped
  • 3 eggs
  • 1 / 2 cup sugar
  • 1 teaspoon vanilla extract
  • 1/4 cup sherry or brandy
  • chopped toasted hazelnut for garnish
  • Fresh mint for garnish

Preheat the oven to 350°F. Cut croissant into 1 inch cubes. Spread croissant on a baking sheet. Bake until lightly toasted; set aside and turn oven off. Spread 1 tablespoon butter in the bottom of an 8 or 9-inch square baking dish and add toasted croissant cubes. Heat half and half and remaining butter in a medium saucepan until almost boiling; add vanilla and sherry; cool to room temp. Whisk together sugar and eggs in a medium bowl and slowly whisk in chocolate mixture. Fill bottom of baking dish with one layer of croissant (use about a third of the croissant cubes), sprinkle with chocolate. Pour sauce over croissant cubes, making sure that all are coated with mixture. Repeat step until the whole dish is filled with croissant, chocolate, and sauce. Let stand for 1 hour and preheat oven to 350°F. Bake for 35 minutes. Serve warm with whipping cream or ice cream!

After our meal, we enjoyed a bike ride to Fremont and watched the amazing fireworks by Lake Union. It was a good freedom day.

Friday, June 19, 2009

Having Pun In the Bathroom

Dylan and I are getting some inspirations to remodel our bathroom....our first major remodeling project! It's a pretty small 9ft by 6ft bathroom....so it should be pretty manageable....I hope.

As we browsed around on Remodelista getting some inspirations, we found these series of clever Pun Tile Collection by Ascot.Dylan and I actually talked about incorporating Corian surfaces and CNC little nooks for soaps, shampoo bottles, and etc. It would be even better to add those Pun Tiles!

Wednesday, May 20, 2009

I Pea-ed My Plants!

I have to credit Jared for this blog titled... This was a joke that Jared had made about my FIRST pea that I grew! That guy think he's a comedian or something....
But this is the first and ONLY one that grew since end of March when we started planting.
I like how you can see the inside! SO CUTE!
But the problem is that there's only ONE....and I worked too hard to want to eat it....quite a dilemma.Also, here's the recent update on the other plants....it's been almost 2 months since we started planting! The cheery and heirloom tomatoes are getting quite tall...at least 2ft tall now! We'll be transplanting them soon. Oh boy!! I just hope it'll yield more than one so I can at least keep one and eat the other!

Jean

Thursday, April 30, 2009

Inspiration: Traditional meets Modern

Saw this on Plastolux. I impressed by how they integrated the addition into the original home! It's obviously different but it still works well all around. I've been fantasizing about how we can add an addition to the back of our house, too...seeing this makes me want it more!
Granted our house isn't two stories tall nor do we have that much backyard space...but, it's still a great inspiration nonetheless. I think we'll be able to save up and do this from our "keep the change" program.
I especially LOVE the backyard with the fireplace that's actually shared in the living room! I like two for one deals....
I like the idea of a 2 sided fireplace that can go perfect between the dupe units in the backyard. We actually want to build a fire pit, either way...we want some hot burning flames outside. Tsssss.....HAAAWT!

Monday, April 27, 2009

Get Caffinated VIA Instant Caffee

This is totally old old news. I'm trying to post all the things I was suppose to months ago! With Jessee who's a manager at one of Starbucks shop in Seattle, so we got to try the Starbucks instant coffee, VIA before it came out! COOL HUH!? But I guess it's really not so impressive sounding anymore since it's everywhere now.... I still have to share that so it makes me feel more special. It worked! :D
But mostly I wanted to share how we all became big fans of these well packaged practical little packets of instant coffee powder. It's so good that you'll want to snort it....oh yeah.
Not only are we in love with the packaging that reminds us of clever Japanese packaging, the taste itself is bold, flavorful and STRONG. It definitely gets me really caffeinated for a good amount of time.

Best part is that we won't have to risk getting bad coffee outside of Seattle...and Italy. I admit it, after living in Seattle for nearly 10 years now, I've become a total coffee snob and I'm damn proud of it!
So no more drinking watered down flavorless coffee on the airplane, in the hotel, at restaurants...or even at your relatives who still drinks Folger's. Sorry relatives.....
Thanks Starbucks VIA ! I can now stuff my pockets full of these babies wherever I go....

Saturday, April 25, 2009

We're Growing!

The dupe got bunch of vegetable seeds and we're growing them!! LOOK! Well...we actually started in end of March. So don't be surprised if you see the plants a foot taller in the next couple posts. :P
This is my first time growing vegetables from the seeds, so this is totally exciting to see these cute little greens growing out of the soil and watch them get taller and taller each day! I know nothing about growing vegetables, so I've been getting lots of great tips from everyone. One great tip we got was putting the seeds in the fridge for couple days and then plant it. This way, it tricks them in thinking that it's warmer weather and then they'll wanna come out! Silly plants...they don't know any better.
Here's what we're growing! Egg plants, beets, cucumbers, peas, peppers, arugula, heirloom and cheery tomatoes, cilantro, dill, chives, basil...Eventually they'll all go to our backyard! I just hope we can keep them alive and to produce some awesome vegetables...otherwise I'm gonna be really sad....and pissed. I'm keeping my fingers crossed...permanently, so that'll ensure all the plants will produce awesome vegetables.

Jean

Thursday, February 5, 2009

30...after 3 months of living

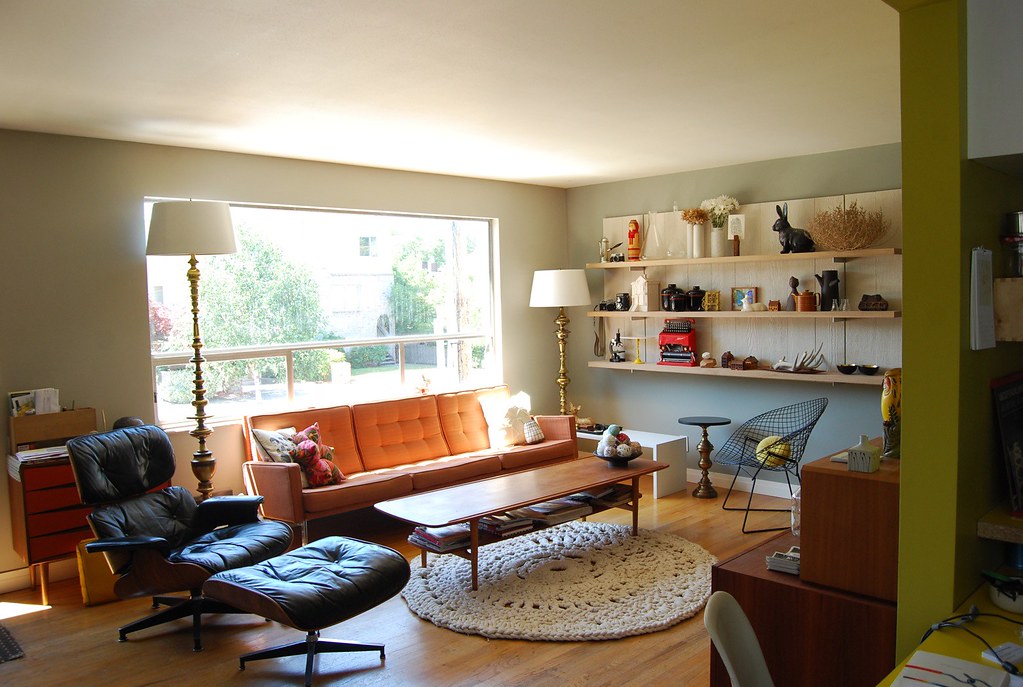
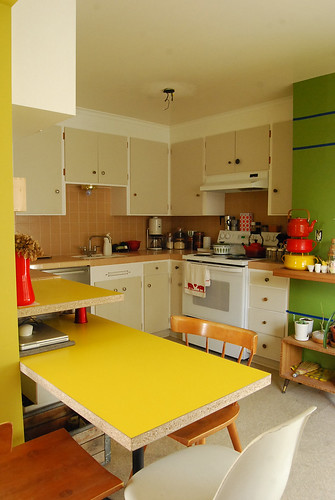
We finally got off in gear and took some pics of our living and kitchen space, which is where we spend most of our time and thus most of our decorating effort.

The biggest impact to date was relocating the fridge from the credenza wall to the door way niche. Although it renders our side door useless, it's totally worth it for opening up the kitchen space...it feels so much bigger now! We took the freed up space and made a two tier seating and work surface using some laminate surfaces (bright yellow!) from Ikea from the as-is for $40 and an old Eames table base. It's great for eating and computer use and the added counter space is a huge plus when cooking. This is where Jean took the retro 50's cake she made couple weeks ago.

BEFORE KITCHEN:

AFTER KITCHEN:
BEFORE LIVING ROOM:
AFTER LIVING ROOM:
The living room is decked out with the Eames lounge and Knoll sofa accompanied by our JOIN Seattle projects: AlphaBrass (lamps) and Megadoiley (rug). The blue tape you see on the wall is a sketch of the modular shelving and panel system we're going to put in hopefully soon (brackets from rakks). It will house the TV and all of our glorious trinkets.
Plus, we put up the really simple mid century globe lamps in the hall way (scored off ebay, 5 for $40) and installed custom base trim (scored for FREE by my Step-Dad Stan! Nothing better than free stuff. Thanks Stan!).
BEFORE HALL WAY: (with boob lights)
AFTER HALL WAY:
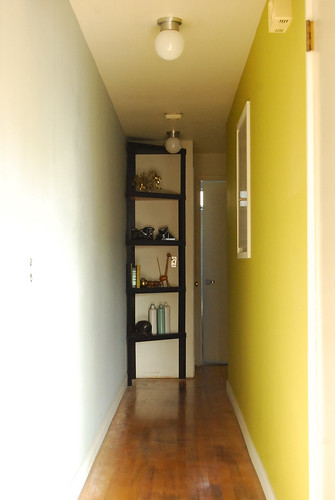
Also, thanks to Home Depot gift cards from my Fam in Wisconsin, we've been able to deck this place out for very little out of pocket $$. Yah!

Progress is slow, but not bad for 4 months in I suppose...plenty more to come!

More on Jean's Flickr.

Monday, February 2, 2009


Ahhh, Superbowl Sunday. It's practically a holiday in conservative, flag-waving Ballard, where residents of the dupe did what any true patriots would due when faced with gridiron mayhem: we invited a bunch of people over, flipped on the big screen, and adjourned to the kitchen where we tried desperately to stay warm in front of the deep-fryer.

In between our asides in deep-fryer experimentation (Chika insists that America is just not ready for the bacon-wrapped marshmallow), we made some downright tasty fried goodies. There were fried plantains, fried pickles, fried lotus root, fried burdock root, fried bacon (that's right), and these bad boys:


Lavender-Infused Honey and Thyme Goat Cheese Jalapeno Poppers:

24 medium-sized jalapenos
8oz goat cheese
16oz cream Cheese
1/3c honey
2T lavender petals
1T thyme, minced
1t + 1T kosher salt
1/2t black pepper
4 eggs
1/3c milk
1c flour
2c panko breadcrumbs
2c oil for frying

Prepare the honey by placing 4t lavender petals and honey together in a glass bowl or jar. Set the jar in simmering water and melt the honey. Let the honey infuse overnight.

1. Set a pot of water to boil. Slice the peppers in half lengthwise, and remove the seeds and stems. Blanch the peppers in the boiling water for 90 seconds, and chill them in an ice bath to stop them from cooking further.

2. Set up a stand mixer with a paddle attachment. Blend the goat cheese, cream cheese, 2t lavender petals, the thyme, and salt and pepper to taste until creamy. With the mixer running at it's slowest speed, drizzle the honey into the cheese 1T at a time, tasting as you go.

3. Heat up oil until it reads 325 on a deep fry thermometer. Prepare a dredging station with three bowls: in one mix the flour with 1T of salt, in another beat the eggs with the milk, and in the last put the panko.

4. Fill each jalapeno half with the goat cheese mixture. Dip each pepper in the flour, dust off the excess, dip in the egg, and then roll in the panko, pressing to adhere. Fry each pepper until the panko darkens, and the filling just starts to leak through the batter. Remove the peppers to paper towels to drain.

Tuesday, January 13, 2009

Color Ka-pow


We have completed most of our painting here on both sides of the dupe, but have yet to get good photos to post. In the meantime, here are a few scans of inspiration examples that guided our color boldness taken from late 60's, early 70's decorating books. While we didn't go so bold as to paint a whole room pink, we definitely used strong colors to define our spaces and "architectural features" (if you want to call them that...). We'll have shots of our actual spaces soon, but in the meantime use these to fuel your imagination...


Posted by Picasa

Saturday, January 10, 2009

Winter Projects

Per Stuart's suggestion, we decided to ditch the driveway and put in an aquarium. There's plenty of street parking anyway, and the garage doors seem pretty water tight. I hope Jean and I don't get TOO distracted by the new view out our basement studio windows.

We did consider the cost of heating and upkeep for such a pool and pet, but we figured it would come back to us at resale time. Plus we saved a ton of money by doing most of the work ourselves and sourcing materials from salvage yards and Craigslist.

I don't want to spoil the reports of other projects, so I won't until we have our pics together. I'll just say there are some good entries to come!

*** Photoshopping and good idea credit goes to Stuart Ottenritter***

Saturday, January 3, 2009

Walk this way (virtually)


I noticed the other day that Google now has its crazy street-level-view system set up for Seattle. Which means you can take a virtual tour of our street and neighborhood. The shots were taken during the summer, before we bought (hence the for sale sign).

Take a walk down NW 62nd here.